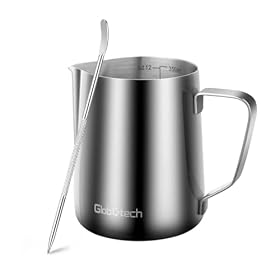
A suitable milk pitcher and thermometer make milk steaming easier to learn and repeat. Here is what matters when choosing size, material, spout design, thermometer style, and cleaning convenience.
Milk pitcher and a thermometer
A milk pitcher and a thermometer are simple espresso accessories, but the right combination makes milk steaming easier to control. Choose a stainless-steel pitcher that gives the milk room to circulate without being oversized, then pair it with a thermometer that is easy to read while steaming and has a probe that can sit in the milk without touching the pitcher’s bottom.
A thermometer is especially useful while learning. Over time, you may rely more on the pitcher’s temperature in your hand and the sound and texture of the milk, but a thermometer provides a repeatable reference point.
Choosing the milk pitcher
Pick the size based on the drink you make
Pitcher capacity should match the amount of milk you steam, not the size of your espresso machine. Milk expands as it incorporates air, so the pitcher should not be filled to the top.
A smaller pitcher is usually easier to control for one small drink. A larger pitcher may be more practical when making multiple drinks or preparing a larger milk-based beverage, but too much empty space can make it harder to create a smooth whirlpool.
As a general starting point:
Choose a small pitcher for a single cappuccino or similar drink.
Choose a medium pitcher if you commonly make larger lattes or want more room for steaming.
Choose a larger pitcher only when you regularly steam more milk at once.
Check the manufacturer’s stated capacity and use markings as a rough guide rather than filling to the rim. Your espresso machine’s steam wand also matters: a short or low-clearance wand may be easier to use with a compact pitcher.
Stainless steel is the practical default
Stainless steel is the most versatile choice for home steaming because it is durable, easy to clean, and lets you feel the milk’s temperature through the pitcher wall. That tactile feedback becomes useful even if you continue using a thermometer.
A coated or colored finish can be attractive, but inspect the care instructions. Some finishes can scratch more easily, and milk residue around the spout or handle still needs to be cleaned promptly. Avoid choosing a pitcher based only on appearance if the interior is difficult to inspect or wash.
Look at the spout and handle
The spout affects pouring control. A narrow, precise spout is helpful for latte art and controlled pouring. A broader spout may pour more freely and can be less demanding for basic drinks. If you are new to pouring, prioritize a predictable stream and comfortable grip over an aggressively pointed spout.
The handle should leave enough room for your fingers and remain comfortable when the pitcher becomes warm. Handle-free pitchers are compact and give direct contact with the metal, but they also require more careful temperature awareness. For most beginners, a conventional handle is the easier option.
The rim should be smooth and the spout should be cleanly formed. Rough edges can make pouring less comfortable and may trap dried milk.
Choosing the thermometer
A clip-on milk thermometer is easiest for steaming
For espresso use, a thermometer with a clip is generally more convenient than a loose kitchen thermometer. The clip keeps the probe positioned in the pitcher while leaving one hand available to operate the steam wand.
Look for:
A secure clip that fits the pitcher wall without slipping.
A probe long enough to reach the milk at your usual fill level.
A dial or display that can be read from above while steaming.
Clear temperature markings.
A probe and body that are easy to wipe and wash according to the instructions.
Do not let the probe touch the bottom or side of the pitcher while taking a reading. Contact with the metal can distort the measurement and may scratch a coated pitcher.
Dial versus digital thermometers
A dial thermometer is simple, does not require batteries, and can remain clipped to the pitcher during steaming. Its main drawback is that small markings may be harder to read quickly, especially when steam is present.
A digital thermometer may offer a larger display and quick-to-read numbers. It needs batteries and may have electronic components that require more careful cleaning. Confirm whether the model is designed for immersion and follow its cleaning instructions; do not submerge the display or controls unless the manufacturer specifically allows it.
For a beginner, readability and secure placement matter more than having the most elaborate display.
Use temperature as a guide, not the only signal
Milk texture depends on more than temperature. The goal is usually smooth, glossy milk with fine foam rather than large bubbles. A thermometer helps you learn a repeatable stopping point, but it cannot correct poor aeration or an incorrectly positioned steam wand.
Many home baristas use a milk temperature in the mid-140s to around 150°F as a starting reference, then adjust to taste and follow the espresso machine and thermometer instructions. Milk can scorch if overheated, so avoid treating a particular number as a guarantee of good texture. If your thermometer is slow to respond, remove the steam wand and pitcher from heat before the reading catches up.
Product prices and availability are accurate as of the date/time indicated and are subject to change. Any price and availability information displayed on Amazon.com at the time of purchase will apply to the purchase of this product.
Buying the pitcher and thermometer together
A compatible pair is easier to use than two accessories chosen independently. Check that:
The thermometer clip fits the pitcher rim securely.
The probe does not reach the pitcher bottom at your normal fill level.
The pitcher is large enough for expansion but not so large that a small milk quantity spreads thinly across the bottom.
The thermometer face or display remains visible from your steaming position.
Both accessories can be cleaned without difficult crevices.
If you already own a pitcher, buy the thermometer around its rim thickness and depth rather than assuming every clip will fit.
Product prices and availability are accurate as of the date/time indicated and are subject to change. Any price and availability information displayed on Amazon.com at the time of purchase will apply to the purchase of this product.
How to use them
Add cold milk to the pitcher, leaving room for expansion.
Attach the thermometer so the probe sits in the milk without touching the metal.
Purge the steam wand briefly according to your machine’s instructions.
Introduce air at the beginning of steaming, then position the wand to create a smooth circulation.
Watch the temperature while listening for a controlled, quiet steaming sound.
Stop before the milk becomes overheated, then wipe and purge the steam wand immediately.
Swirl the pitcher and pour soon after steaming.
Always follow the espresso machine manufacturer’s instructions for steam-wand operation. Steam can cause serious burns, and the pitcher may become too hot to handle safely.
Product prices and availability are accurate as of the date/time indicated and are subject to change. Any price and availability information displayed on Amazon.com at the time of purchase will apply to the purchase of this product.
Cleaning and maintenance
Rinse the pitcher soon after use so milk does not dry around the spout or inside the seam near the handle. Wash it with warm water and dish soap as allowed by the manufacturer. Clean the thermometer probe after every use, taking care not to immerse electronic parts that are not rated for it.
A thermometer that becomes slow, fogged internally, damaged, or difficult to clean should be replaced. Replace a pitcher if its interior is badly scratched, the handle is loose, the spout is damaged, or its coating is flaking.
When you may not need a thermometer
A thermometer is optional if you already judge milk by pitcher warmth and texture, or if you mostly drink espresso without steamed milk. It is most useful when you are learning, want repeatable results, or share the machine with someone who is still developing technique.
If your budget is limited, prioritize a well-sized stainless-steel pitcher first. A thermometer is a useful learning aid, but it cannot compensate for a poor-fitting pitcher, blocked steam wand, or weak steam performance from the machine.
FAQ
What size milk pitcher should a beginner buy?
For most beginners, a small or medium pitcher is the practical starting point. Choose based on the amount of milk you normally steam, leaving room for expansion rather than filling the pitcher to the top.
Is a thermometer necessary for making steamed milk?
No. It is a learning and consistency tool. It helps establish a repeatable temperature reference, while texture, sound, and pitcher warmth remain important parts of steaming.
Can any thermometer be used with an espresso milk pitcher?
Not necessarily. A suitable model should have a secure clip, an immersion-safe probe, readable markings or a display, and a probe that does not touch the pitcher during use. Follow the thermometer’s cleaning instructions.
What is the best material for an espresso milk pitcher?
Stainless steel is the practical default because it is durable, easy to clean, and transfers enough heat for you to feel the milk warming. Coated pitchers can also work, but require attention to finish-care instructions.